

I was very hesitant to have a wall-mounted TV, but it really is a space saver. The down side? Those pesky TV wires. We put the TV up about 10 months ago, and I've been staring at wires ever since. Not any more! My super-talented father-in-law loves a good DIY, and luckily he was ready to help my husband and I attack this one. I already had the fabric (purchased from IKEA), because originally I planned on making curtains or pillows with it. Enter Fred with his frame-as-coverup idea. After much discussion and anticipation about we picked a DIY date and put this plan into action. Of course you will modify accordingly, but I think this would work so well for anyone trying hide wires. We conveniently have a recessed wall area over the fireplace, but if you don't and want a more finished look you could always "frame the frame" with strips of molding.


Measure and layout before purchasing your materials. It might help to draw up a sketch. Materials we used: Five 2"x1"x8' wood strips/The DIY Kreg Jig/ pack of 1 1/4" pocket screws/Hand saw/Fabric for your panel/Cotton batting/Staple gun/Power drill/Saw horses/Tape measure/Clamp/Xacto Knife/ Scissors/4 L-Clips

Drill pocket holes in order to create a frame. Using the Kreg Jig we were able to make two pocket holes per joint and connect the two pieces of wood at a 90 degree angle. The Kreg website has a video that helps to explain this. It made this project much easier to complete, we had the correct angle every time!

Clamp the corner joint together before drilling the screws into the pocket holes.

Check to make sure that the frame is the correct size.

We laid out the sub frame to fit around the TV mount.

Use a hand saw to cut the wood...but you can also use a chop saw.
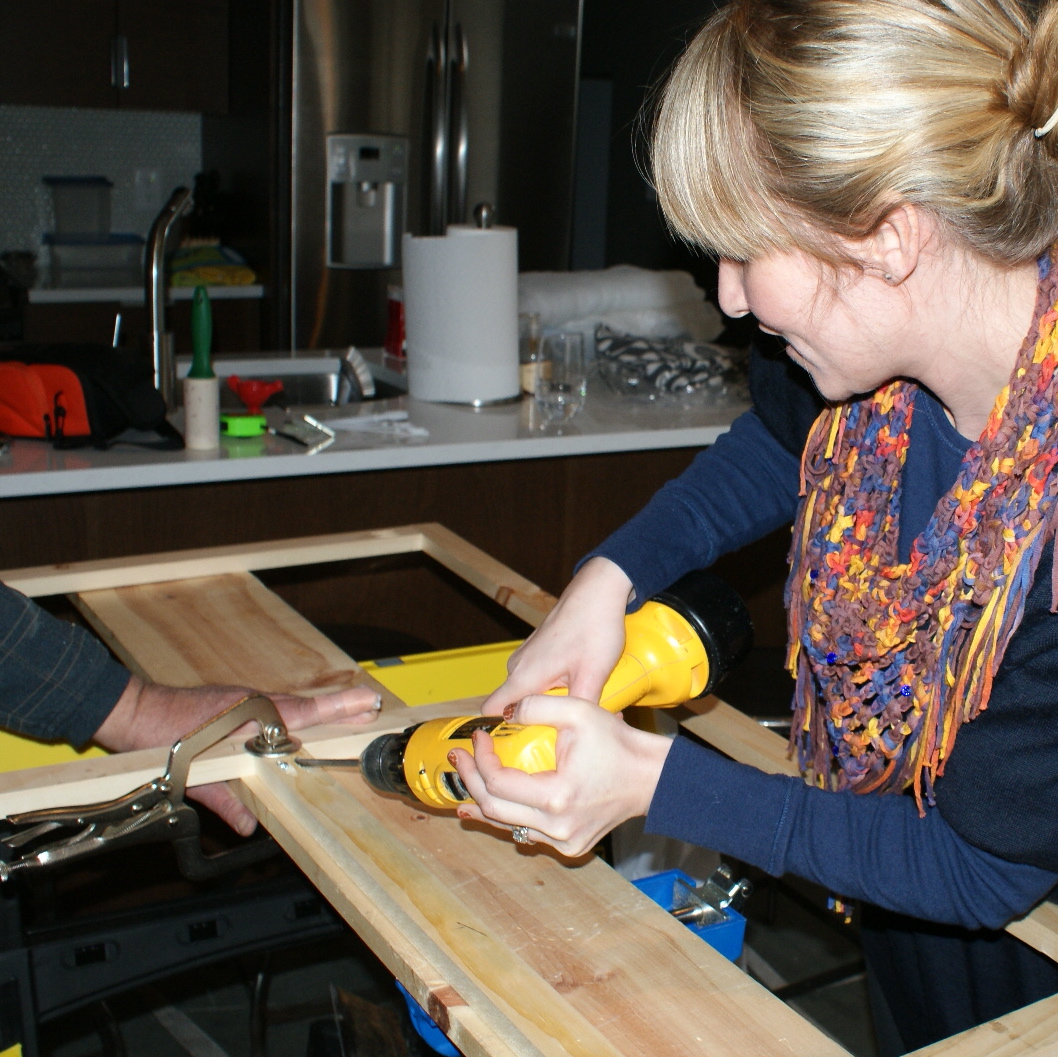
I'm drilling the screws through the pocket holes to fasten the two joints. I love a good power drill, it takes me back to my days as a display coordinator at Anthro. This was easy peasy!

Frame is done! We placed it on our dining room table to have a work space. Lay out the fabric on top of the frame and adjust till it looks visually pleasing within the fame. Start stapling in one corner just to tack the fabric down a bit.

Flip over the fame with the fabric to continue pulling and stapling. We used a little extra padding in areas (cotton batting) to reduce the gap between the frame and the wall. Our existing wall was a little out of square. This pic also gives you a perfect shot of the completed sub-frame!

This is when having some extra assistance comes in handy (thanks Mom-in-law!) We had to pull and hold the fabric taught starting along one side while stapling the fabric consistently along the backside of the frame. Repeat along all sides while making sure to keep the fabric pulled tight.

Now the crucial part...were you wondering how to keep the fabric taught even with a large hole being cut out of the middle? Staple the fabric to the sub-frame prior to cutting the hole to ensure that the fabric will not loosen up. See the rectangular outline of staples in the pic!

Using an exacto knife, cut an X from corner to corner of sub-frame, within the staple outline. Staple the flaps to the back of the frame and cut off any excess material. I was almost sad to cut the hole because the panel looked so pretty...hint, hint if you don't have TV wires to hide: without the hole this could simply be a pretty piece of wall art!

My man putting the finished piece up...we used 4 L-clips to fasten the frame to the wall.


TA-DA!!! Wires are completely hidden, and we have beautiful wall art instead. This was a simple DIY, especially with the support of my father-in-law and his Kreg Jig (I love that thing.) The finished product is something that we can easily take down and put up again in a few years to replace the fabric if we want a fresh new look. Currently it's perfect for our color scheme of blue and grey with pops of yellow. We couldn't be happier with the outcome, it adds character to the living room. I think a few decorative objects on the mantel are long overdue!
This came out better then I could have even imagined! I love love love it! Way to go Becs, Nick and Mr. Santilli! :) xo
ReplyDeleteAww thanks so much Les! We are loving it too! It's great to have a "handy" family backing you up haha
ReplyDeleteLOVE IT!
ReplyDeleteThanks Jaz!!! And you saw it in person ;-) xo
ReplyDeleteThankyou for sharing such as informative blog. Keep it sharing.
ReplyDeleteDrop Down brackets